


Information
SysKey (SAM Lock Tool) is an in-built Windows utility that can help you secure the Security AccountsManagement or SAM database. The SAM Database stores hashed copies of our user passwords, which is encrypted with a locally stored system startup key by default.
You can use SysKey to store the startup key locally in Windows or on a USB flash drive. Having the startup key stored on a USB flash drive instead will give you better security since the USB flash drive must be connected at startup to be able to login and gain access to Windows.
This tutorial will show you how to use SysKey to be able to create a USB flash key "Startup Key Disk" to lock or unlock Vista, Windows 7, or Windows 8 with.
You must be logged in as an administrator to be able to do the steps in this tutorial.
 Note
NoteIf you Lock Windows with OPTION ONE:
The startup key placed on the USB flash drive is only good to gain access to logon to the specific Windows that it was created in.
This will only lock the Windows computer at boot from a cold startup after a restart or shut down. It will not lock Windows after a log off, lock, or switch user.
Once Windows has started after logging in, you will no longer need to have the USB flash drive connected. It is only required to be connected at system startup at boot.
You will still be able to continue to use the USB flash drive as normal. Just do not ever delete theStartKey.Key file on it, or you will not be able to unlock Windows with it anymore.
It is recommended to create a USB flash drive per user that you wish to be able to log in from startup.EXAMPLE: Windows Startup
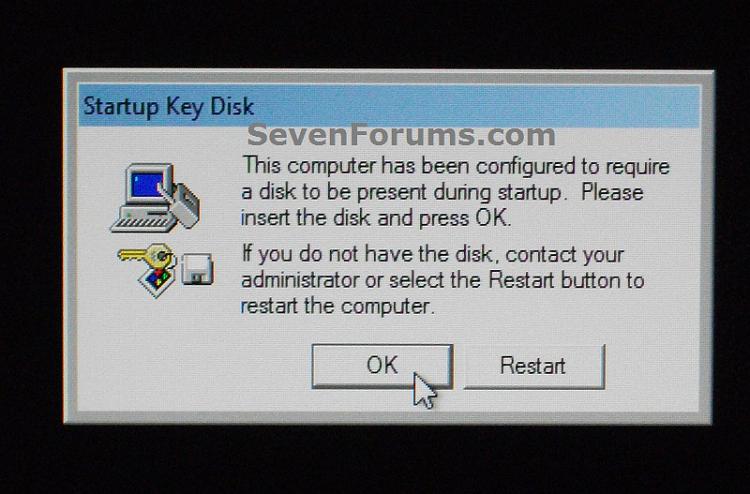
NOTE: This is an example of what you will see at Windows startup after using OPTION ONE. Windows will not startup until you connect the USB startup key.
OPTION ONETo Lock Windows to Require a USB Key at Startup to Unlock
NOTE: This option will store the startup key on your USB flash key instead of locally. It will require the USB flash drive to be connected at system startup to be able to unlock Windows.
1. If you have not already, you will need to change the drive letter of the USB flash drive to have the letter A. (see screenshot below)

2. Press the Windows+R keys to open the Run dialog, type syskey, and click/tap on OK.
3. If prompted by UAC, then click/tap on Yes (Windows 7/8) or Continue (Vista).
4. Click/tap on Update. (see screenshot below)

5. Select (dot) System Generated Password, select (dot) the Store Startup Key on Floppy Disk option, and click/tap on OK. (see screenshot below)

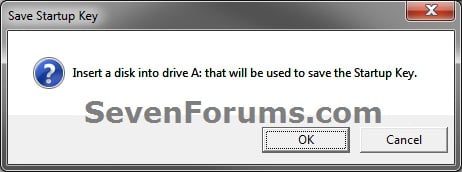
6. If you have not already, connect the USB flash drive with the drive letter of A from step 1, and click/tap on OK. (see screenshot below)
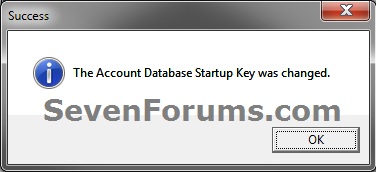
7. Click/tap on OK. (see screenshot below)
NoteThis places the StartKey.Key file on the USB flash drive. If you already have an existing StartKey.Keyfile on the USB, then the older existing one would be renamed to StartKey.Bak for the new one to be saved to it.
It is recommended that you keep a backup of this StartKey.Key file at another location in case the USB gets corrupted or lost. This way you will be able to copy it to another USB with a drive letter of A to be able to gain access to Windows again.

8. Click/tap on OK. (see screenshot below)
9. Windows will now require this USB flash drive to be connected at startup when you boot your computer to be able to login to Windows.
OPTION TWOTo Unlock Windows to Not Require a USB Key at Startup
NOTE: This option is the default setting in Windows to store the startup key locally. It will undo OPTION ONE to have Windows no longer require the USB flash drive at startup.
1. Press the Windows+R keys to open the Run dialog, type syskey, and click/tap on OK.
2. If prompted by UAC, then click/tap on Yes (Windows 7/8) or Continue (Vista).
3. Click/tap on Update. (see screenshot below)
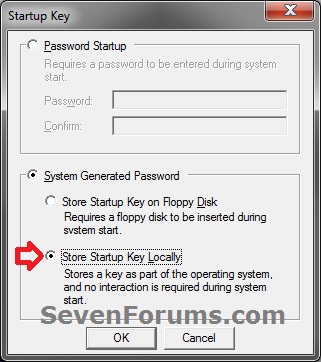
4. Select (dot) System Generated Password, select (dot) the Store Startup Key Locally option, and click/tap on OK. (see screenshot below)
5. If you have not already, connect the USB flash drive with the drive letter of A from OPTION ONE, and click/tap on OK. (see screenshot below)

6. Click/tap on OK. (see screenshot below)
7. Windows will now no longer require the USB flash drive to be connected at startup for access.


0 comments:
Post a Comment