


Google Chrome performs automatic updates every few weeks in order to make Chrome browser more secure and stable. But sometimes these new versions are not very stable or they present compatibility problems in their use. For these reasons, it's better to disable the automatic update procedure to avoid such problems.
How to prevent (STOP) Chrome to Auto-Update.
Method 1: Disable Chrome Update through Chrome.
1. Open Google Chrome and at the “URL Address Bar”, type: chrome://plugins & press “Enter”.
If you want to stay constantly protected from malware threats, existing and future ones, we recommend that you install Malwarebytes Anti-Malware PRO by clicking below (we do earn a commision from sales generated from this link, but at no additional cost to you. We have experience with this software and we recommend it because it is helpful and useful):
Full household PC Protection - Protect up to 3 PCs with NEW Malwarebytes Anti-Malware Premium!

2. In the listed plugins, find the plugin named “Google Update” and press the “Disable” option under it.
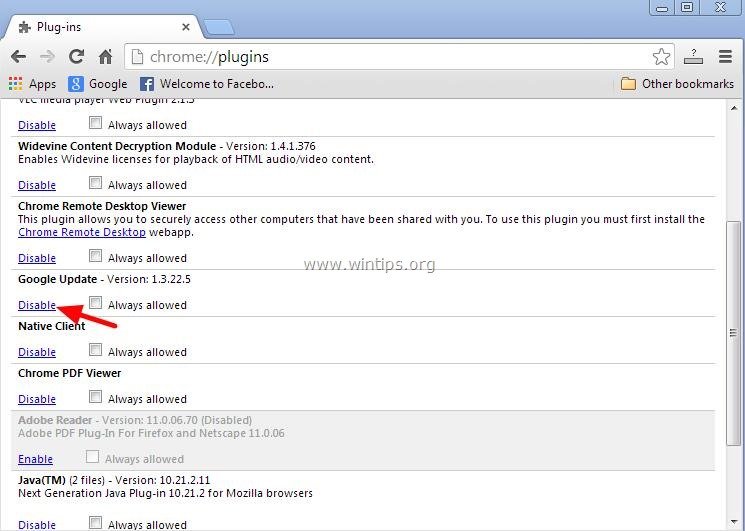
3. Finally restart your Chrome browser for changes to take effect.
Method 2: Disable Chrome Update through Windows Registry
Open Registry Editor.
To do that, open the “Run” command* and in the search (run) box, type “regedit” and press “Enter”.
* How to open the “Run” command:
Windows XP:
Click on the “Start” button and choose “Run”.

Windows 7, Vista
Click on the “Start” button and click on the “search”box.

Windows 8:
Right-click on the bottom left corner and select “Run”.

2. Inside Windows Registry, navigate (from the left pane) to this key:*
HKEY_LOCAL_MACHINE\SOFTWARE\Policies\Google\Update
* Note for Windows 8.1 users: The above key doesn't exist in Windows 8, so you have to create it (and one more key) manually: To do that:
Navigate to this key at left pane: HKEY_LOCAL_MACHINE\SOFTWARE\Policies.
Right click on Policies and select New Key.
Give the name Google
Right Click on Google key and select New Key.
Give the name Update
At right pane, right-click on an empty space and select New > DWORD (32-bit) Value
Give the name UpdateDefault
Modify the UpdateDefault value data to 0 as described below (3).
After you modify the value date, navigate to this key at left pane: HKEY_LOCAL_MACHINE\SOFTWARE\Wow6432Node\Google
Right click on Google key and select New Key.
Give the name Update
At right pane, right-click on an empty space and select New > DWORD (32-bit) Value
Give the name UpdateDefault
Modify the UpdateDefault value data to 0 as described below (3).
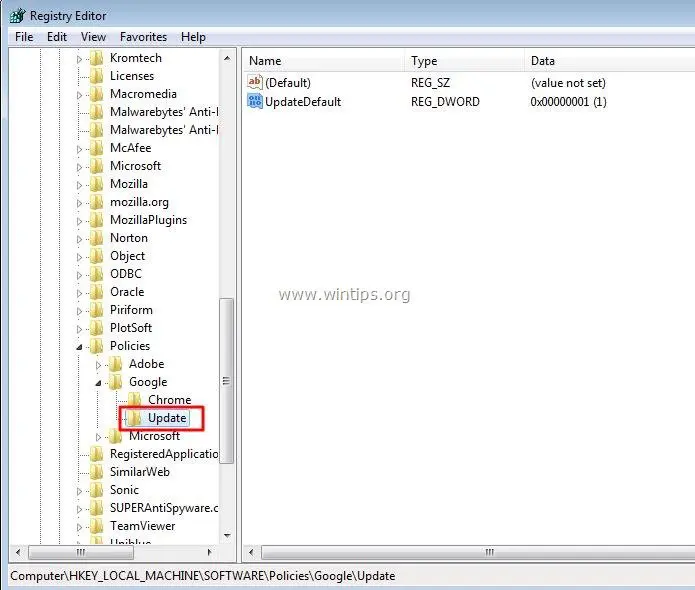
3. At the right pane, double-click at the “UpdateDefault” registry key and set its value data to “0”.

4. Press “OK” to close that window and then close (exit) Registry Editor.

That’s it.
Remember that you can always enable the Chrome automatic update feature anytime you want, simply by setting the Value Data to “1” in the same registry key (UpdateDefault).


0 comments:
Post a Comment